I wanted to print a public domain book to read and refer to later. Sometimes it’s fine to peruse a book on the computer, but if you are using as an active reference a hard copy is the way to go.
This is the first method in a multi-part series. How many parts? Who knows…I’ve also fallen slightly into the bookbinding hobby (read hole) and look for little practice projects. The book is a small format but 200+ pages. It needs to be made with multiple signatures sewn together into a text block. This requires the pages to be arranged in specific order and printed on both side of a sheet. That process is called ‘imposition’. It seems that many choose to use custom software, often that costs money, to do this. I had the inclination to see if I could finagle what I needed out of the software options already included with the PDF reader and printer.
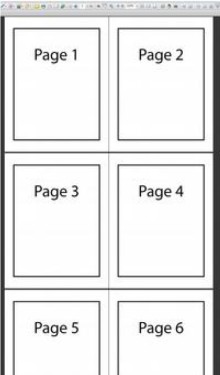
This is a sample book PDF that I made to illustrate the process. I’m showing it in 2-up continuous mode so you can see the order of the pages. This is just like 99%+ of all the PDF books you’ve opened. Note that the page size for each page is 4.25”x5.5”. The borders are inset from the actual page edge as you can see below. The borders are just there to give a sense of proportion to the page and loosely represent a text block. I am using an older version of Acrobat and Windows 7 so there may be some variation from your menus’ appearance. These are all basic settings and likely come with all software that opens PDFs.
I made the sample book 16 pages so that I could make 2 signatures of 2 sheets (4 book pages) each. This is the minimum to demonstrate the method. In most cases you’d want 4-8 sheets per signature.
Method 1: Booklet FROM AdoBe Acrobat’s Print Menu
This method only works if pages are the size you want or larger. For some reason, Acrobat’s print menu doesn’t have zoom settings for the booklet option. This works fine for printing 8.5″ x 11″ 2-to-a-side onto 11″x17″ or 8.5″ x 11″.Go to File ->Print.
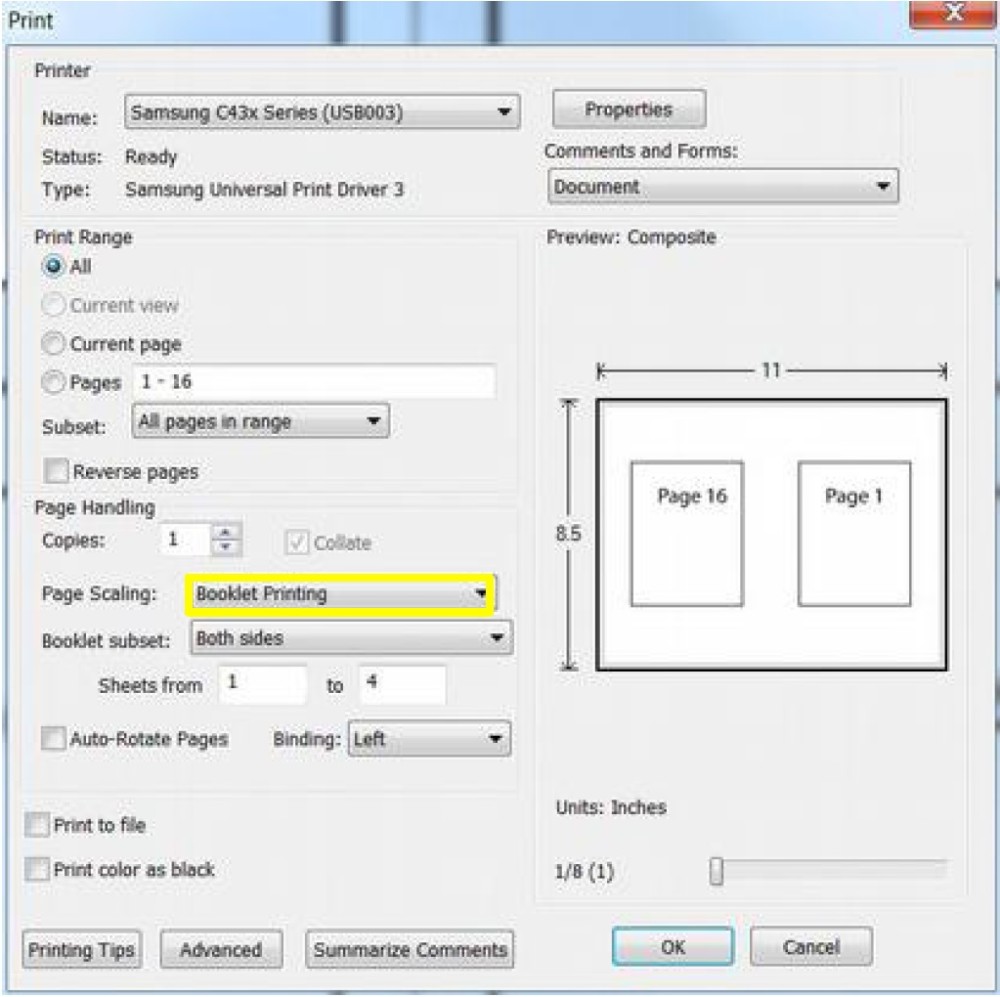
Select the “Booklet Printing” option from the section “Page Handling”. The default settings look like this:
As you can see, it wants to print all the pages in the book as a single booklet. This might be OK for a small book, but we want 2 signatures with 2 sheets each. Fear not! (or Spend not!) There is no need for fancy software to re-order our print.
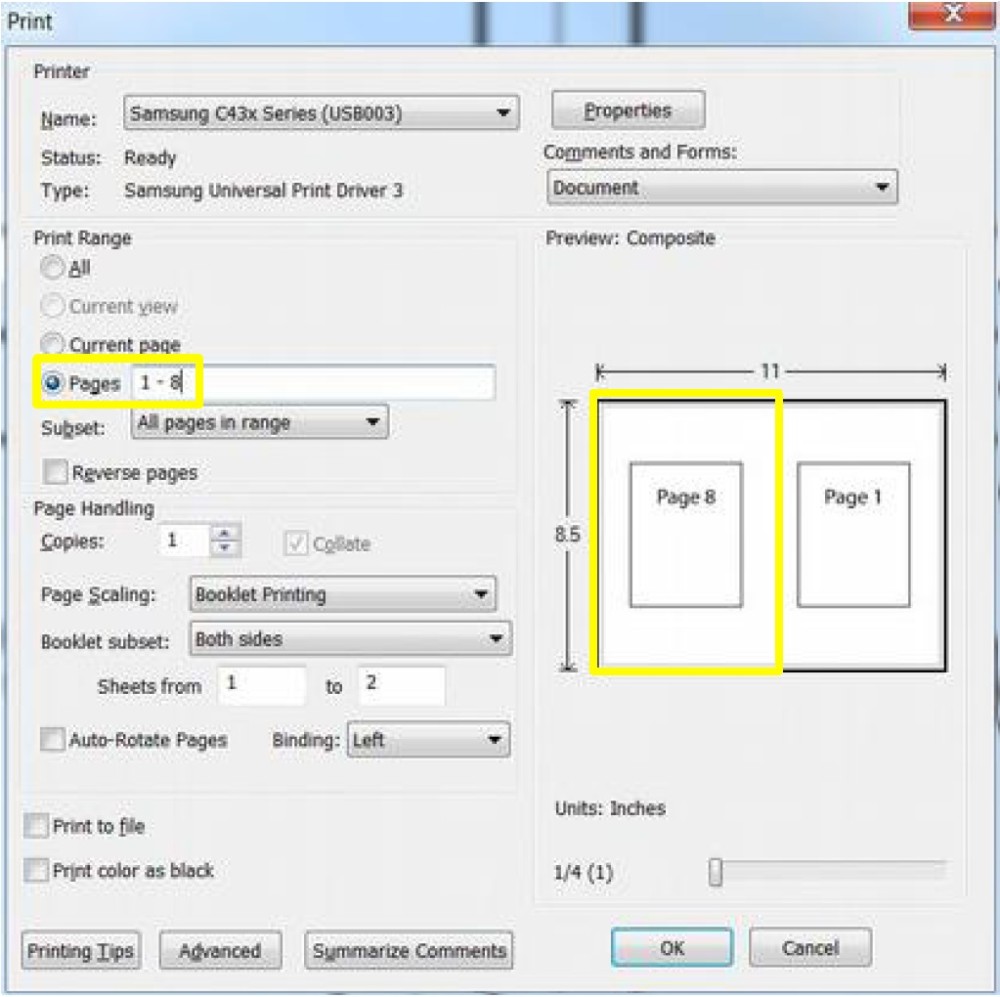
In the “Print Range” section, select “Pages” and enter 1 – 8.
You’ll see the page on the left of the preview change to Page 8. This one setting creates a ‘booklet’ out of pages 1 – 8, which is just a signature of the first 8 pages of the book, perfect!
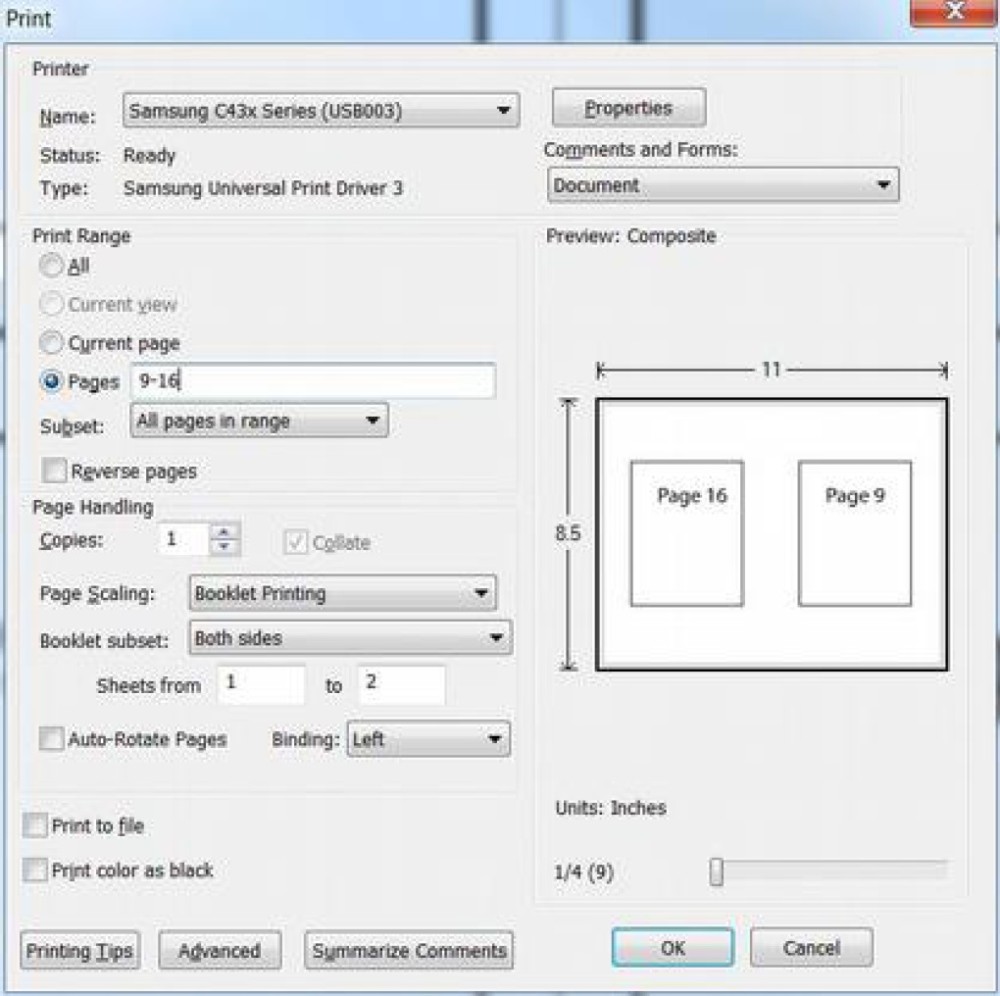
To create the second signature, change “Pages” to 9 – 16.
Now that you know how to configure the Adobe Acrobat print menu and booklet options, you need to make sure your printer will handle the printing correctly. Note: For this method I avoided configuring the booklet settings in the printer menu only for several reasons:
- Some printers don’t have this option at all or the ability to select ranges of pages.
- You may want to create a file output rather than an actual print. The above method allows this. If you need to print multiple copies or a single copy periodically, having the re-ordered signatures saved in files will save some hassle and prevent errors. You can also recombine those ‘signature files’ into a complete but out-of-order book just for printing.
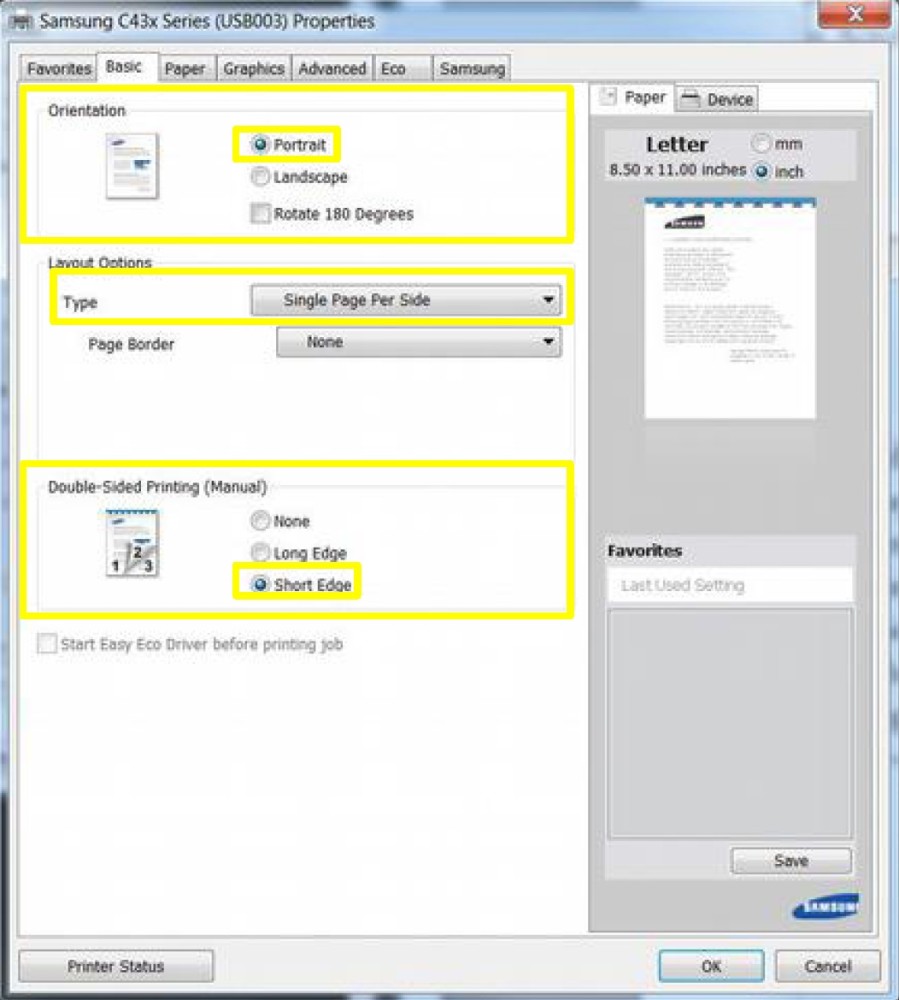
Every printer will vary. Mine has a dual-sided print feature. The Acrobat menu knows we want double-sided printing and the orientation of the images. We don’t have order our book pages in the print menu the only task is to make sure it prints double-sided and that it prints the ‘sheet’ generated in Acrobat with the correct orientation (ie Landscape). I highly recommend you do a double-sided printing test with your printer and 2 full-sized pages so you understand which way to flip and insert paper in the feed trays. If you are lucky and have a duplexing printer, it’ll flip pages over automatically. Some printers, like mine, allow you to ‘batch’ the double-sided printing. For example: I can print side A of both sheets in the signature, then move them back to the tray and print side B. The only downside to doing this is if there’s a miss-feed or human error, the second side can end up with disordered sheets that are useless. I consider this a trade-off instead of babysitting each sheet. If this paragraph is confusing, that’s why I recommend doing some double-side printing tests.
Here are my settings. Honestly, the combination doesn’t make sense to me either, but I had to try several options before the print came out correctly. For some reason, in other configurations the pages would be rotated 90°.
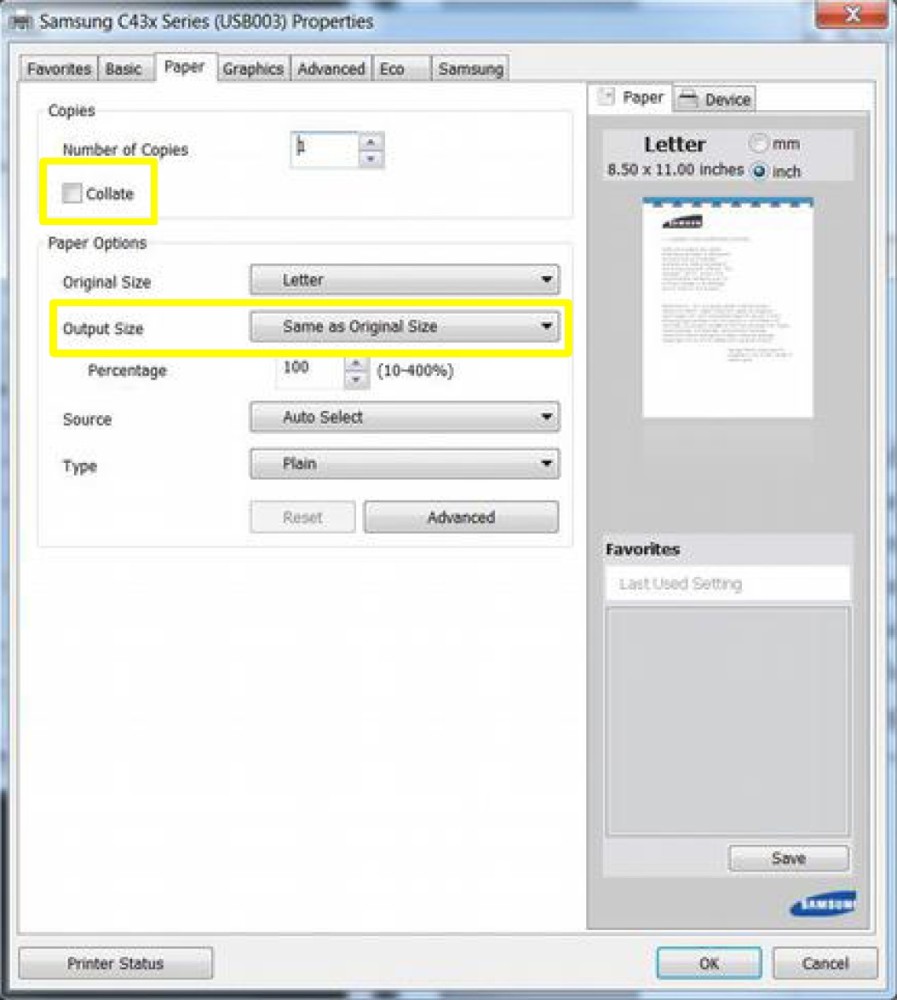
Relevant options highlighted in yellow. Others are straight-forward and should be adjusted based on your paper or print quality preferences.
More printer settings:
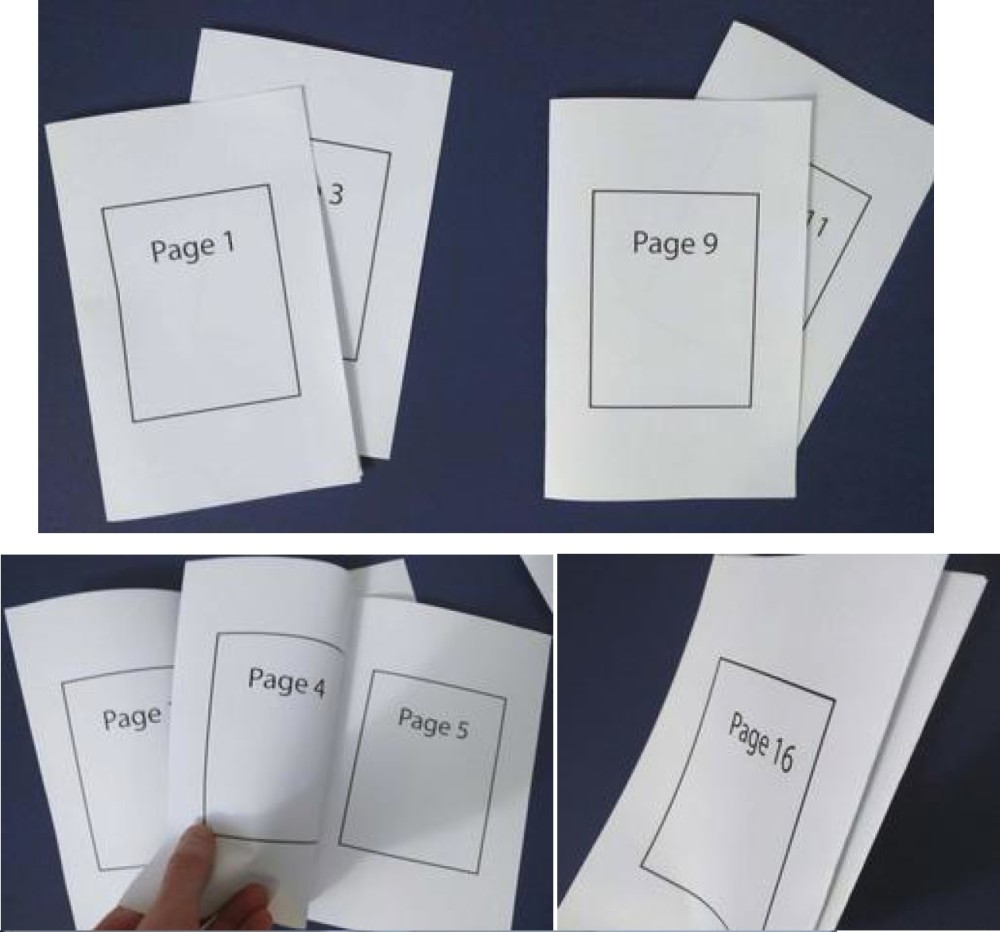
Here is the final output. Just what we wanted!

No Comments