I ended my post on Day 5 noting that I’d started one of the aprons. Before I pick up on that, let me cover some early conclusions about my material choice.
The simple statement is: ‘whitewood’ from the borg is a poor choice to use in the construction of this bench.
In addition to being multi-species, rounded over, soft and not very clear, it also takes wood movement to a whole new level. This wood is supposed to be “S-Dry”, seasoned dry to between 18%-12%. All my boards were pretty straight upon purchase. In the course of a month or so, several boards became comically twisted or bowed. After seeing this, I can’t imagined using this as a stud in any structure. Luckily, I was able to weed out the problematic boards.
I had a choice at the beginning of the project to use whitewood (Hem-Fir), S-P-F lumber or get reasonably priced hardwood (alder, ash, or steamed beech) milled to spec. The whitewood added up to less than $90 in material. The milled to spec, S4S kiln-dry, select or better Alder was estimated to have been $350 or perhaps a bit less. The Alder is harder and stronger than the Hem-Fir, would move around less and would have come from the miller almost perfectly planed. It would have been worth my time planing twice over to go for the more initially expensive option. I also could have had fewer laminations in the aprons or slab and solid legs.
Lesson learned. However, it was worth proving that it could be done with the cheapest wood out there.
Building the Aprons
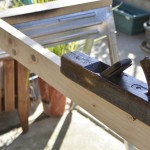
Scrubbing with an old jack plane
To clean up the board and to give a loose reference for jointing a square edge, I cleaned up the faces of the boards with a No. 6, but any plane would be fine. Just enough to get out the bumps and mill marks.
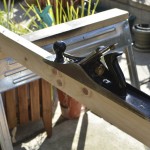 I next scrubbed the edges of the boards to remove the easing. Especially with the the apron, you want as much surface area for the joint as possible. There’s roughly 3/16ths of an inch to remove, stop just before the boards’ edges become defined. I then switched to the No. 6 again. It’s a bit short to be the ideal jointer, but it’s all I had at the time and beats the pants off a No. 5. I planed the edges to remove wind, bumps, and bows. None were too serious, but kept the joints open even under pressure.
Then, you’ll want to figure out which face of the boards will show outward and try arranging them edge-to-edge for the easiest initial fit. Make sure the top board of the apron has a straight and clear top edge. Number the boards and indicate the orientation so they can be reassembled later.
To get the joints well fitted, I took one pair after another and planed the edges to match. A few swipes to compensate for a gap or twist was all that was needed on most of the boards. This worked fine for me, other techniques I’m sure will work better.
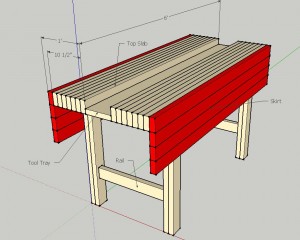
I mentioned before that I added some simple dowel joints to the aprons. This choice is for strength. In a typical bench setup, the leg-frame has stretchers and the legs are morticed into the bench top. That design provides a fairly rigid frame. The apron design this bench uses relies on recesses (or housing dadoes in joiner parlance) to keep the frame rigid. For the apron glue-up the main direction of force is parallel to the length of the joint, rather than across it as is the case of the work-top. This force will come from the legs racking against the recesses while the bench is in use for planing. The racking will cause the top board to try to move the opposite direction of the bottom board. I was concerned enough with the my jointing technique that I figured some dowels to prevent a sliding joint couldn’t hurt. It turns out the pegs also helped align the boards during glue-up.
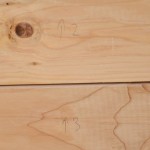
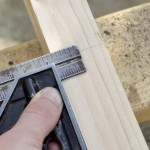
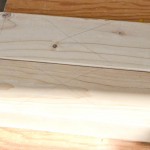 You’ll have to be careful about the locations of the dowels so as not to interfere with the housing dadoes to be made later. Paul Sellers’ plans put the housings 9 in. away from the bench edge and they are 5.5 in. wide. I’m using the same dimensions. Because I’m still not 100% sure of the final length of the bench, I marked a ‘no drill zone’ (the |X| area in the image at left). Here’s a trick to the layout:
- Divide the total length(s) of the completed bench by 2.
- Subtract from that 9 in. This is how far the outside edge of the housing dado is from the center of the apron.
- Find the center of your apron and mark that.
- Use the measurement from step (2) and mark that distance both directions from center.
- Now, subtract 5.5 in from the measurement in step (2) and also mark that in both directions from center.
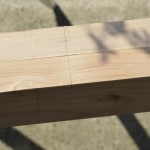
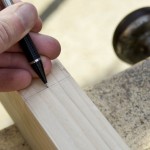
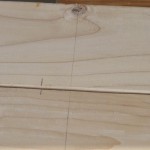 I staggered the actual dowel joints near the ‘no drill zone’. I wanted to keep them close to the legs so as not to interfere with future modifications or holes for board support holes. I put 4 dowels in each joint, one on either side of each housing dado. You can see a layout mark for a dowel joint in the image at right, about 1/2 in. away from the future housing.
I transferred the mark from the face across the boards at the same time. Make sure the correct edge is marked. I then set my combination square for 3/4 in. which is nearly the center of the board. The depth mark is taken from the marked outer face, be careful with this! If you switch which face you measure from the boards probably won’t fit. You could use a snazzy self-centering gauge instead. Before you drill any holes, line up the mating edges and check that your marks align. I was careful and diligent and did not experience alignment issues, but it would be easy to mess up. Not something you want to find out half-way through glue-up!
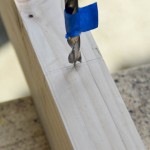
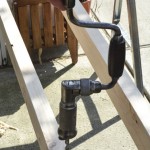
Rather than use an awl to create a dimple for the brad-point bit, I used the metal tip of my mechanical pencil. It’s always on hand and more than sufficient for softwood. All that’s left is to drill the holes. My dowels are 5/16ths in. and I could have used a hand drill, breast drill or brace. I went with my Fray No. 66 brace (6″ sweep). I find a masking tape depth stop more than sufficient, but it can keep the flutes from clearing so remember to clear them between holes. I used a brace rather than a cordless drill to keep the project 100% handwork once I’d gotten the lumber.
Finally, we’ve reached the glue-up. Nothing too special here. I dribbled the glue into the dowel joints of the boards first. I placed the dowels in the board nearest me for each joint. Next, I glued the facing board with the usual healthy dose of glue. A rubber mallet came in handy for driving the joints together. After tapping the dowel joints home, everything was clamped and left to dry.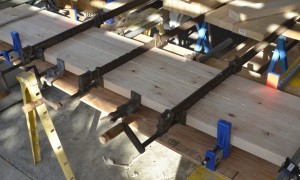

Thanks for your article I learned some things from it. Good content on this site. Looking forward to your new posts!
I am just drawing up some plans in Sketchup for a Paul Sellers type bench and found your blog via a link on Pinterest. Did you finish the bench and if so, how have you found it? I can’t see any more posts with the #workbench tag.
I am probably a day or two of work from finishing it but it has been sitting for some time (why finish a project when you can start another?). I’ll upload my sketch-up files if they can be of any help.
http://zengrain.com/library/british_S_bench.skb
http://zengrain.com/library/british_S_bench.skp
If I’m honest, I’m not a huge fan of the bench’s design. There is nothing wrong with it but it clashes with my preferences with vises and clamping. I highly recommend anyone spend the extra money to get S2S or S4S depending on the part of the bench. Depending on where you live go for at least an inexpensive hardwood. Around here poplar or alder are good choices. They will mortise better but are not much heavier. Don’t focus on hardness, the bench doesn’t need to be that hard, just stiff. Get the widest boards you can for the apron and the thickest for the laminated top. Planing 2x4s gets old in a hurry. Unless you have a powered jointer and planer, get a lumberyard/mill or friend with a shop to take care of that for you. I budgeted out my bench and there was ~$150-200 between getting surfaced hardwood and 2x4s, don’t be fooled, you will spend the difference in time and depending on workmanship and patience, the final product. When gluing the apron boards on edge I highly recommend adding dowels as shown.
With regard to the joinery I don’t believe most traditional bench designs are any more difficult to make. You can certainly get more complicated but remember there are still 8 mortise & tenons, plus 4 recesses in the apron. It is strong and can be constructed such that the legs can be broken down to a more manageable size. Remember what everyone says: you probably don’t need a bench anywhere as large as you think. Mine is quite large, build yourself a smaller one (you’ll thank my later).